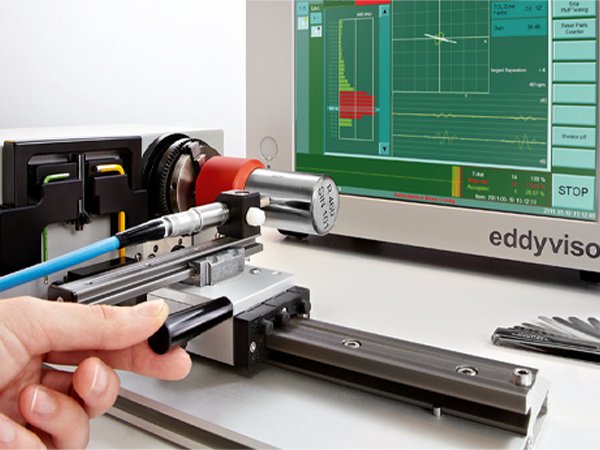
Laboratory lathe
Ideal solution for feasibility studies and other laboratory applications of eddy current crack detection
For years we have worked with small lathes available on the market in our ibg laboratory and used them for demonstration purpose at our customers, but no one type met all our requirements and so we decided to develop an own lab lathe.

Based on the experiences gained during countless feasibility studies for our customers a small and compact lathe was designed optimised for requirements of eddy current crack detection. It is produced at the headquarters in Ebermannstadt. Made in Germany – it is a guarantee for innovation, quality and love of detail.
Customers with eddy current experience who often do their own feasibility studies in their factories are convinced and wanted to get such a lathe after seeing it during a presentation, workshop, training or fair. Therefore we offer the lathe which was originally intended for internal use now as a standard product to you.
The probe fixture is movable on two lead screws and continuously rotatable with effortless access to different test locations enabling testing of very complex parts. Whether testing an outer circumference with several diameters, the end faces, the recess, teeth or a borehole – all those location can be reached and tested with simple adjustment.
If test locations e.g. of a line scan must be exactly reproducible for several test parts of same type, adjustable stops can be set.
The test parts are clamped either from inside or from outside with the three-jaw chuck and reversible jaws or positioned in a test part fixture.
Vertical erection of the ibg lathe enables a gravity positioning. A proven concept for testing mini series as the exchange of the test parts is considerably eased and accelerated.
The ibg lathe enables quick and cost effective testing of a wide parts range with a few standard probe types and test part fixtures.
The speed of the lathe is electronically infinitely variable up to over 500 rpm.
An adjustable proximity switch sends a trigger signal once per revolution to the test instrument which accurately locates the defect on the circumference without any further means.
The concept is rounded off with a handle and fixtures for the chuck and probe adjustment tools. The compact design and the supplied transport case allow it as hand luggage in an airplane.
Technical data:


